How to Create a QR Code Menu in 5 Minutes with ShevaFood
Discover how to transform your paper menu into an interactive digital experience with ShevaFood, no technical skills required. Join thousands of restaurant owners who have revolutionized their customer experience.
How to Create a QR Code Menu in 5 Minutes with ShevaFood
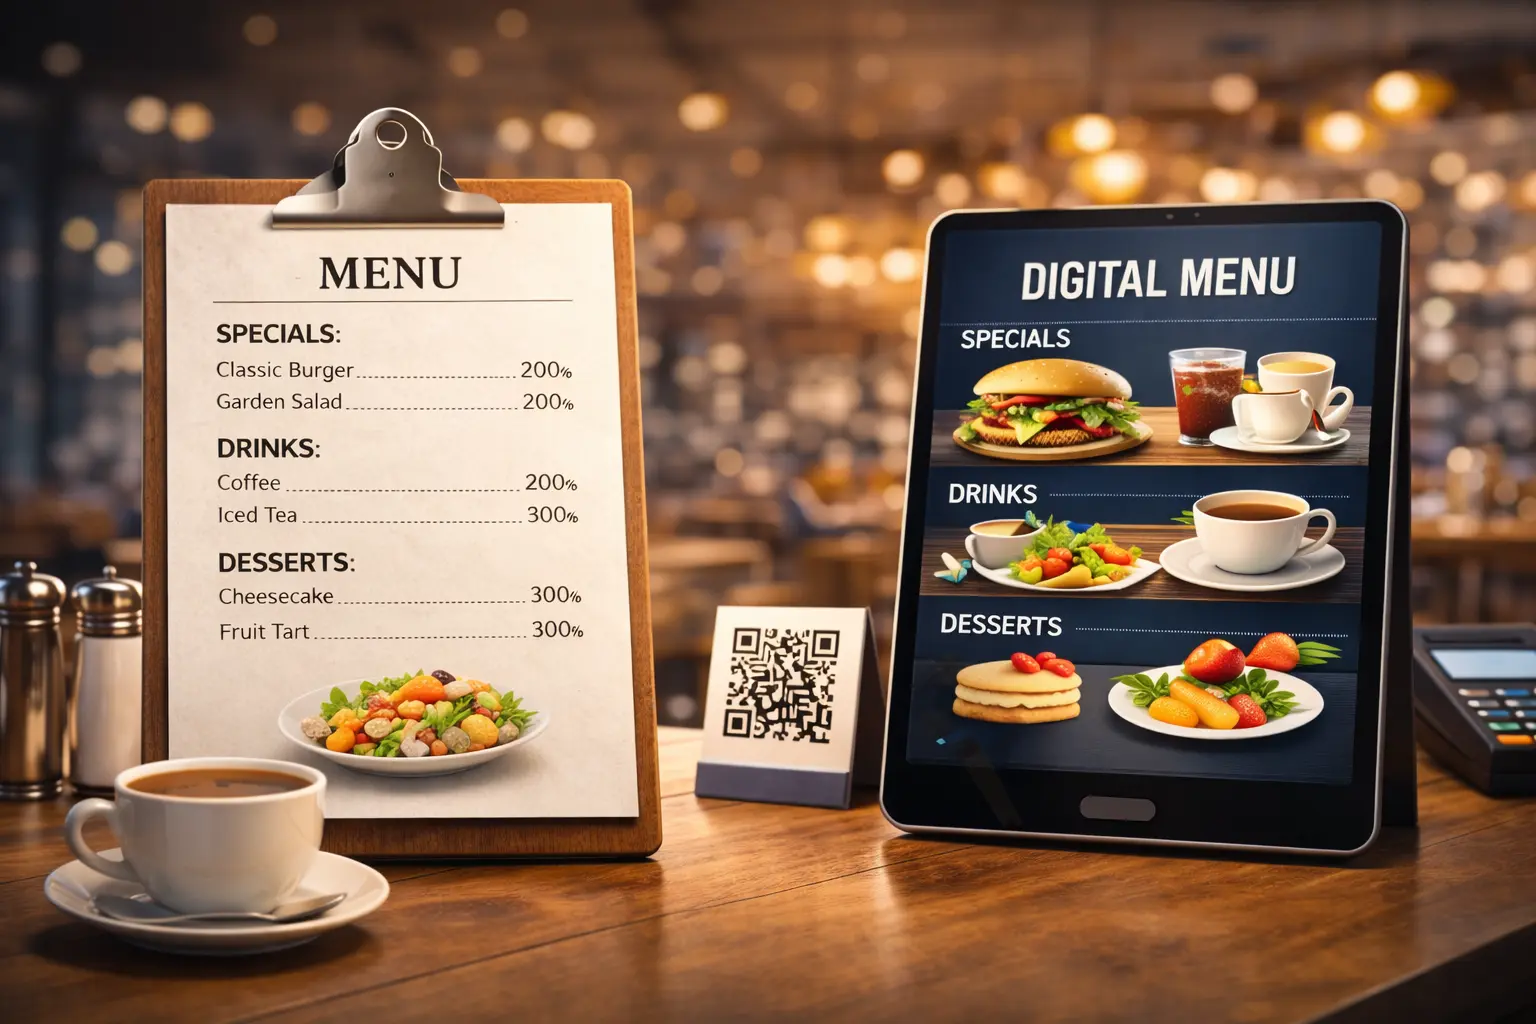
In the world of modern restaurants, offering a digital menu accessible via QR code is no longer a luxury but a necessity. This solution offers unmatched flexibility, reduces printing costs, and improves the customer experience. The good news: creating such a menu is now within reach of all restaurant owners, regardless of their technical expertise.
This guide explains, step by step, how to create your own professional QR code menu in just 5 minutes.
Why Adopt a QR Code Menu?
Before we begin, let’s recall the concrete benefits of a digital menu:
- Instant updates: change your prices, add or remove dishes without reprinting
- Significant savings: no more recurring printing costs
- Better hygiene: contactless solution appreciated post-Covid
- Enhanced experience: add photos, detailed descriptions, and translations
- Valuable data: analyze the most viewed dishes
Step 1: Create Your ShevaFood Account
The first step is the simplest:
- Go to www.shevafood.com
- Click on "Get started now" at the top
- Fill out the form with your basic information
- And you’re all set! You’re ready to create your digital menu
Pro Tip: Use a professional email address that you check regularly, as this is where you’ll receive important notifications.
Step 2: Configure Your Establishment in 4 Quick Steps
During your first login, ShevaFood guides you through an ultra-simplified onboarding process:
- Establishment name: Enter your restaurant name (e.g., “Cameron’s Counter”)
- Type of establishment: Choose from Traditional restaurant, Fast food, Café, Bar, Pizzeria, etc.
- Cover image: Select an image from our gallery or upload your own photo
- Menu languages: Choose the languages you want to offer to your customers
And that’s it! Your QR code is automatically generated and ready to use.
Now that your restaurant is configured and your QR code generated, you can edit and customize your menu directly from the intuitive ShevaFood application interface.
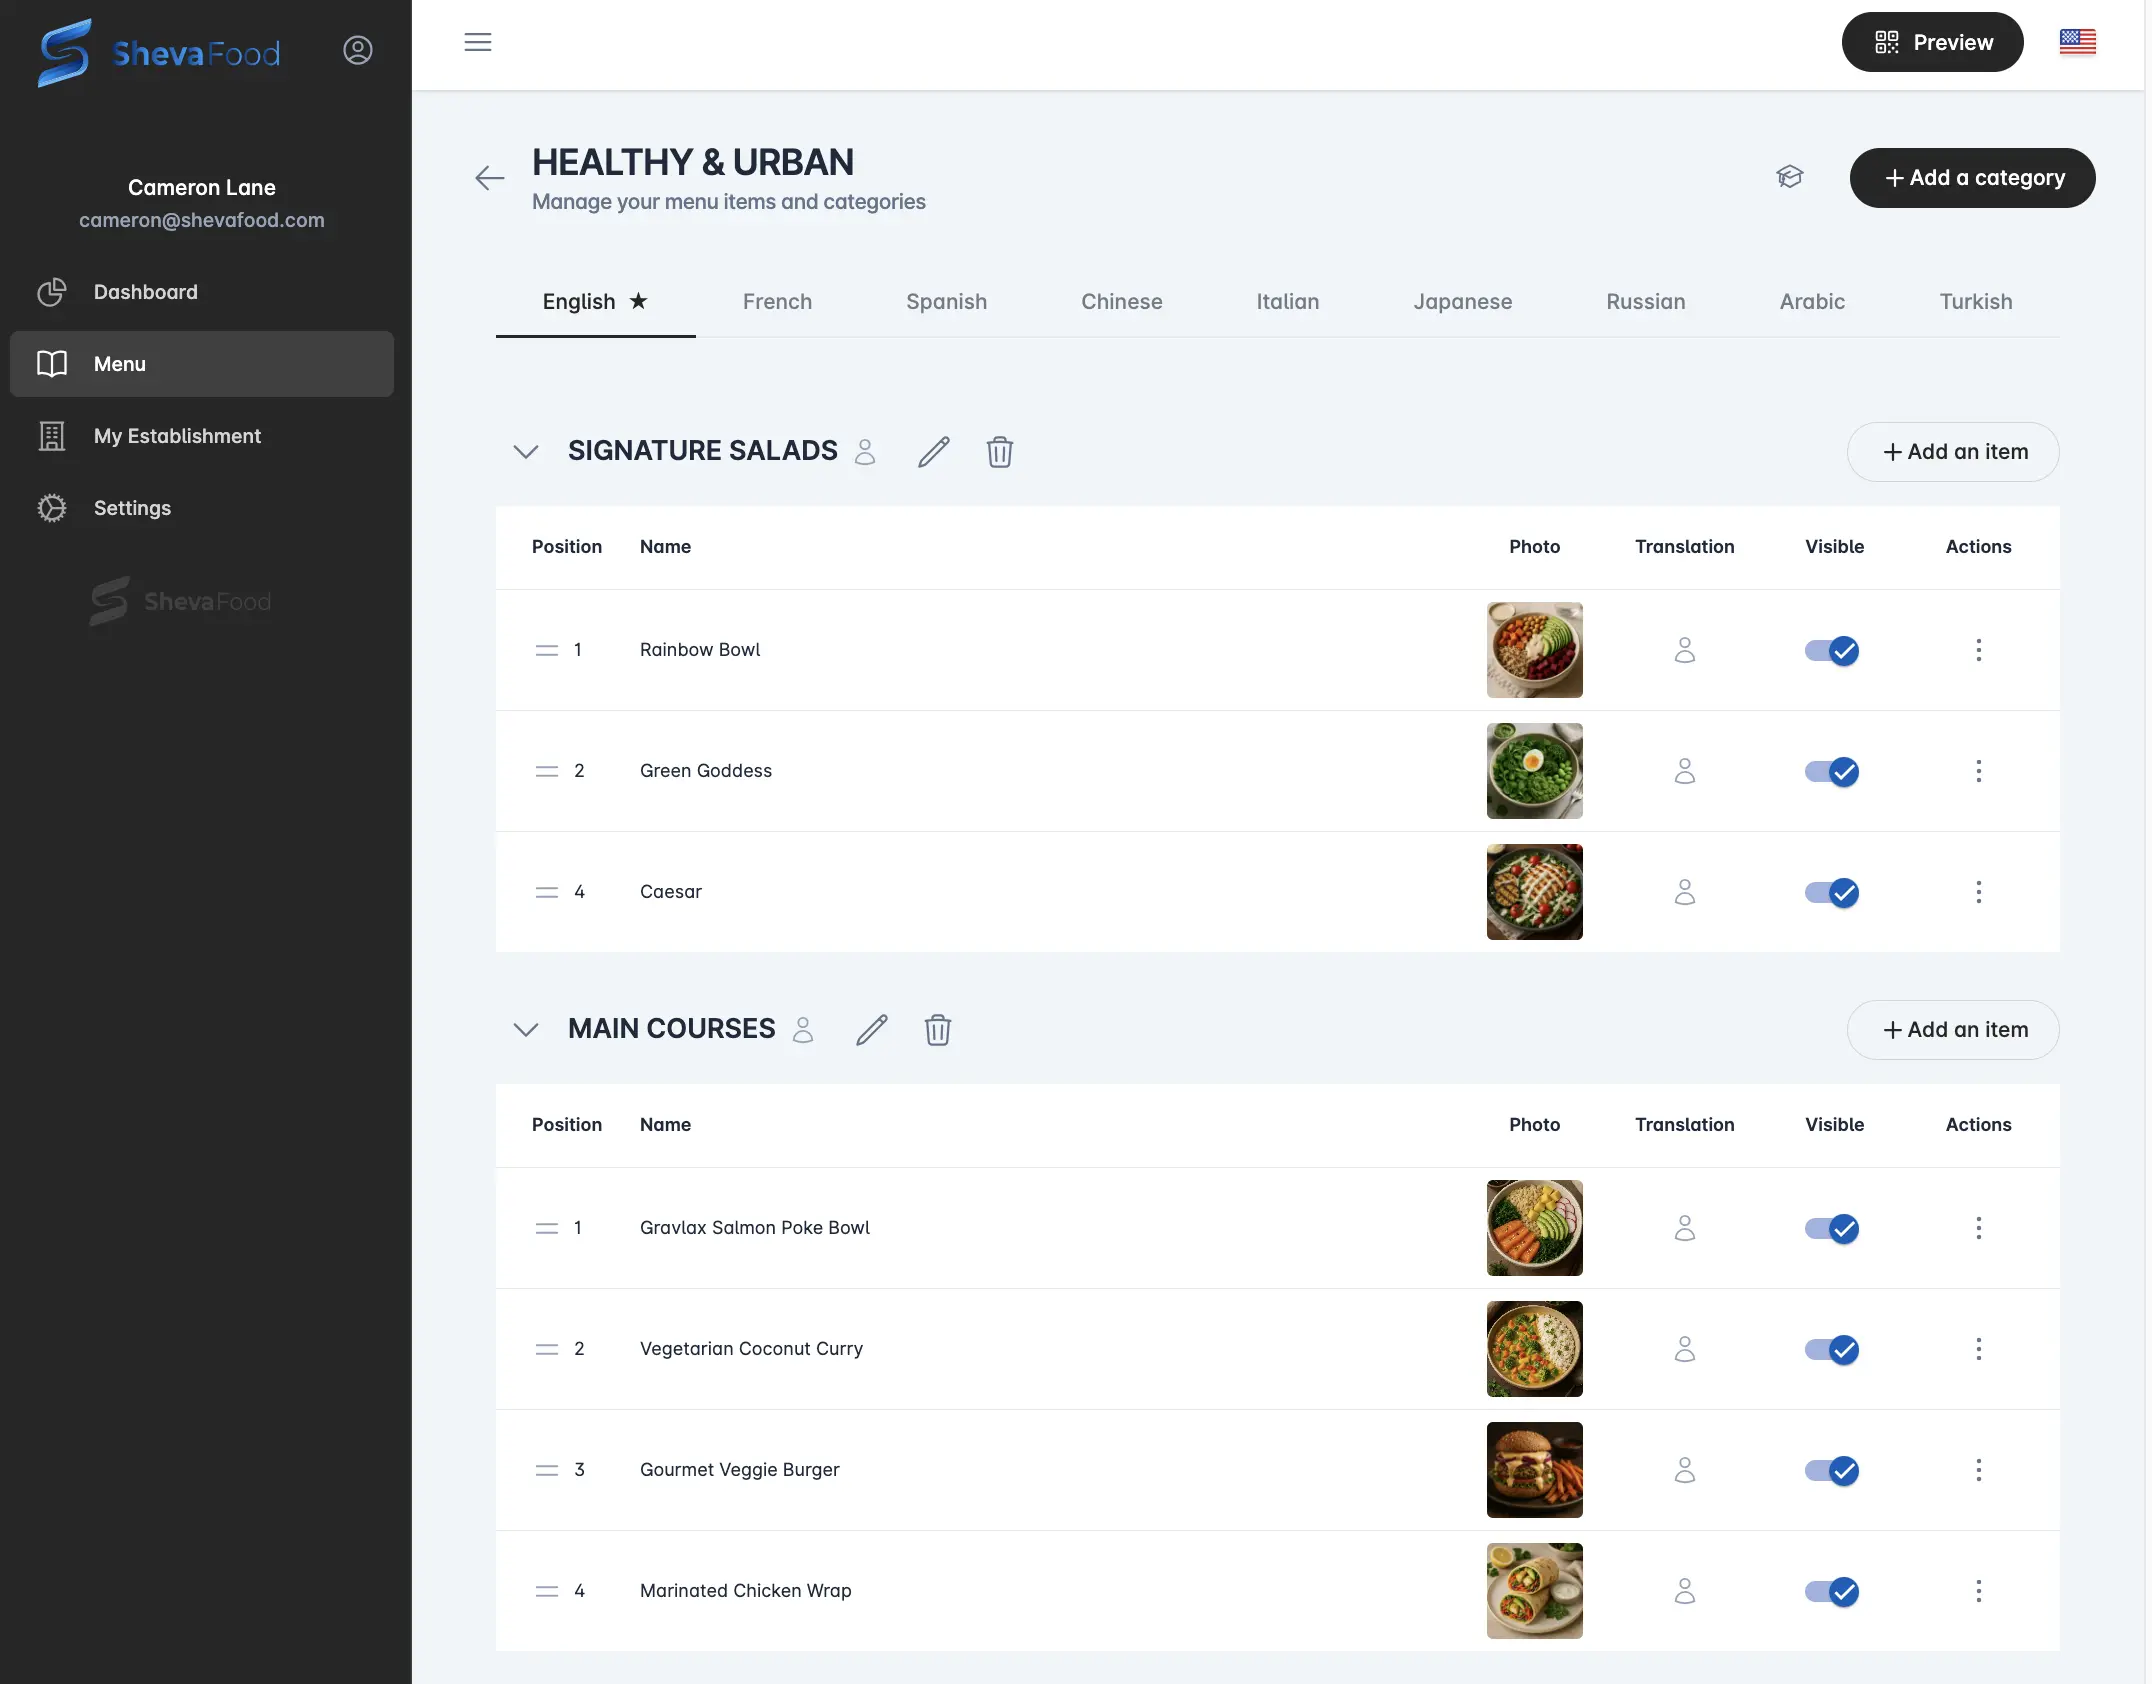
Step 3: Create Your Menu Categories
On the Menu page, you can start structuring your offerings:
- Click on “Add a Category”
- Name each category (Starters, Main Courses, Desserts, Drinks, etc.)
- Define the display order by drag and drop
Tip: Limit yourself to 6-8 categories maximum to avoid overloading the user interface.
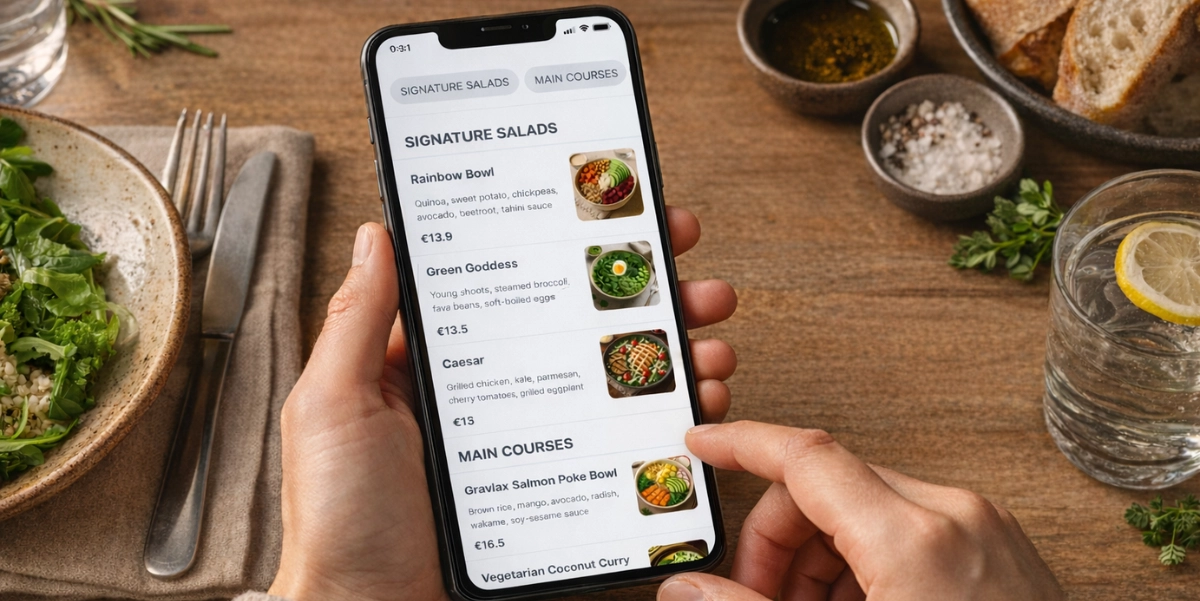
Step 4: Add Your Dishes and Drinks
This is now the heart of your menu:
- In each category, click on “Add a Dish”
- Enter for each item: name, description, price, photo
- Add allergens and tags if necessary
Advice: Quality photos significantly increase the appeal of your dishes!
Step 5: Test Your Menu Instantly
Crucial but often neglected, this step will save you many disappointments. With ShevaFood, your changes are visible immediately on the QR menu:
- Scan your QR code with several phones (Android and iPhone)
- Check that everything displays correctly in real time
- Test navigation between categories
- Verify that prices are accurate
- Ask a few customers or friends for their feedback
- Make instant corrections if necessary
Advanced Features to Explore
Once your basic menu is created, explore these options to go further:
Multilingual Menu
Ideal for tourist areas, enable multiple languages:
- In the “Menu Languages” section
- Select the desired languages
- Translate your dishes (or use machine translation as a base)
Social Networks
Link your social profiles for better visibility:
- In the “Social Networks” section
- Add your links to Facebook, Instagram, etc.
- Increase your online visibility
Additional Information
Add complementary content for your customers:
- In “Additional Information”
- Add custom text visible on your public page
- Present your story, values, or any other relevant information
Tips For a Successful QR Menu
To maximize the impact of your digital menu:
- Train your team: Make sure your staff can explain how to scan the QR code
- Communicate clearly: Add simple instructions near the QR code
- Keep some paper menus: For less tech-savvy customers
- Gather feedback: Listen to what your customers say about this new experience
- Update regularly: Take advantage of digital flexibility to update your offerings
Troubleshooting: Common Problems and Solutions
| Problem | Solution |
|---|---|
| QR code won’t scan | Increase contrast, print in better quality |
| Menu loads slowly | Compress your images, check your WiFi connection |
| Layout deformed | Test on different devices, adjust responsiveness |
| Dishes poorly organized | Review category and item order |
Conclusion: Your Digital Menu is Ready!
By following these simple steps, you’ve transformed your traditional menu into a modern digital experience in just minutes. Your new QR code menu is now:
- Easily accessible for your customers
- Fully customizable at any time
- Representative of your brand
- Economical and ecological
Remember that the key to success lies in regular updates. Take advantage of this new flexibility to evolve your offerings according to seasons, trends, and customer feedback.
Do you have questions or need help? Our support team is available 7 days a week via live chat from your ShevaFood dashboard.
Ready to revolutionize your customers’ experience? Start Free Trial today and join the digital revolution in restaurants!